Wednesday, November 26, 2014

Vintage Christmas Cards

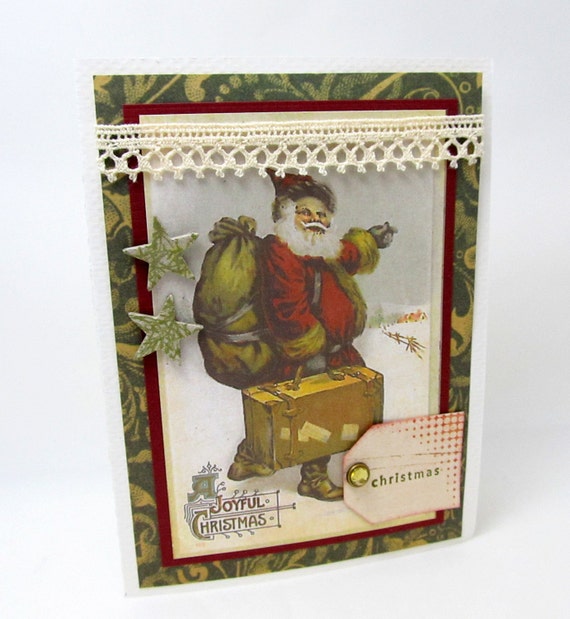
Christmas is less than a month away and it's time to start on those holiday greetings! Today I'm featuring a card I created that has a vintage flair and a delightful Santa Claus.


Using 7Gypsies Santa's Journey paper, I began with a panel of the lovely green Victorian motif paper. I then cut out the image of Santa Claus, backed it with dark red paper and centered it onto the green panel. The top of the piece is adorned with a strip of ivory lace trim and then attached to an ivory card. I distressed two chipboard stars with dark green ink and glued to them to the card. Then I punched out a tag from 7Gypsies Lille paper, stamped "Christmas" with dark green ink, attached a gold brad and placed that in the bottom corner of the card.
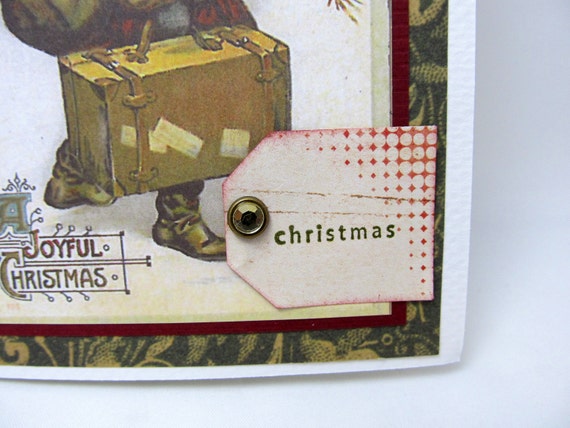
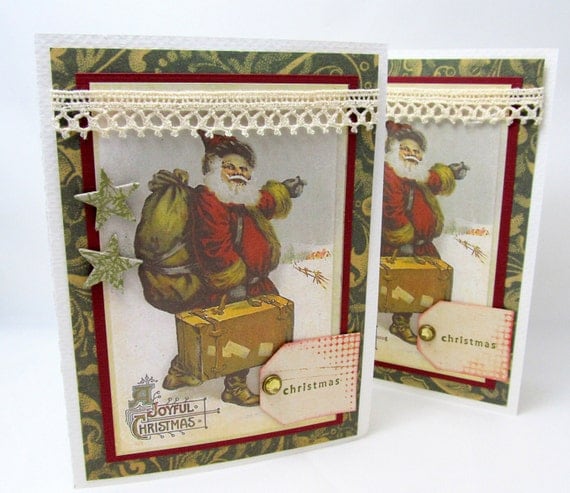
I love the vintage feel of these cards and the Joyful Christmas message in the corner!

Joyful Christmas Card - Vintage Christmas - Santa Claus - Old-Fashioned Christmas - Blank Card - Holiday Card - Red and Green

I hope you are inspired to create your own holiday greeting cards! Please stop by soon as I'll be featuring more Christmas goodies!

Thanks for visiting today!

Beth


Monday, November 17, 2014

Gift Box with Vintage Sheet Music

Happy Monday!

The holiday season is not too far away so today I'm featuring a little gift box I created using vintage sheet music.


I started with a square kraft box (4" x 4" x 2") and distress painted it with Tim Holtz Vintage Photo Crackle Paint. When that dried I painted the box with a layer of metallic acrylic paint.


After that dried, I adhered a copper edged burlap ribbon around the edge of the lid. I decoupaged vintage sheet music to the top of the lid and then adhered shabby chic flowers. I hand stamped "Peace" onto an ivory tag and attached that to the lid. Two gemstones add a finishing touch.


This box would be perfect to present a gift, or would make a lovely keepsake box on its own. In either case, I hope I gave you some ideas for the upcoming holiday season!

Thanks for stopping by today!

Beth


Thursday, November 6, 2014

Vintage Postcards

Hello everyone! Hard to believe we are into November already!
Today I'm featuring cards I created using Ewe-N-Me Printables Hang Tag - Postcard Backs downloadable. Back in August I featured cards using the Postcard Back Collage Sheet -- so as you can see I am just crazy about these images.


There are eight tags altogether (four different images) on an 8.5 x 11 page. I printed mine on a piece of white cardstock and then cut out the tags for today's project. I inked the edges in black ink, but that's not really necessary as they print out with a distressed edge look. I added an eyelet and a piece of red twine to the tags and they could certainly be used just like that. Wouldn't they look wonderful on a gift bag or box for a special occasion this fall?


For the card, I used white cardstock as a base and layered it with rustic colored striped paper. I added a red burlap ribbon, two gold brads and stamped some vintage script in the bottom corner. I cut out a square of the same striped paper and, using my postage stamp punch, added "for you" on top.


The final step was adding the tag to the top of the card.


Wouldn't this card be a fun greeting to send to that family member or friend who loves vintage?


I hope you enjoyed my project today. And as always, thanks for stopping by.

Beth


Wednesday, October 29, 2014

Keepsake Boxes


I'm a big fan of kraft boxes because they have so many possibilities. They can be painted and embellished and decorated to make the most amazing decorative boxes ... or, with just a bit of adornment still look great.

Today I'll show you two examples.


The first box is distress-painted with white acrylic paint. After the paint dried, I added a red burlap ribbon to the bottom of the box and dark brown lacey trim to the lid.


Once that was done, I decorated the lid with sparkly shabby chic flowers and holly berries adorned with twine. I added a kraft tag embossed with "Christmas" in dark brown ink.


This box would be a great way to present a gift -- or would make a lovely keepsake box on its own.

The other box I created is much more simple, but every bit as lovely.


I adorned both the bottom of the box and the lid with decorative ribbon. The lid is adorned with two burlap flowers, an ivory hand stamped tag and two pearl embellishments.


Both boxes offer two different presentations, but are each lovely in their own way.

Glad you stopped by today!

Beth


Wednesday, October 22, 2014

Autumn Blessings Pillow Box

Hello again! Isn't it hard to believe we're more than halfway through October and well into autumn?

With that in mind, I'm so pleased to share a tutorial for a lovely pillow box using the Ewe-N-Me Printables Autumn Blessings Pillow Box. This project is perfect for fall and Deena makes it super easy to create.


The image prints out on an 8.5" x 11" sheet and I printed it on white cardstock.


I cut out the image and followed the directions on where to fold and score -- it's that easy!!


Once that was done I inked the edges with black ink and started to shape the pillow box. The printed image has brown edges, but I used a darker ink to add even more contrast.


I used double-sided tape to attach the flap to the other side of the box.


Following the scored edges, I folded the sides inward to finish the pillow box. It's not necessary to glue the sides, but I added a bit of tape for extra reinforcement.


Isn't this just so lovely? 


I made several boxes -- they look great as part of my autumn decor -- they would be perfect for upcoming gift giving, too!

For more fun and festive pillow box downloadables, please visit Ewe-N-Me Printables.

Thanks for stopping by!

Beth

Monday, October 20, 2014

A Big Thank You ...

to Julie from Julie's Spoonful of Sugar. Julie was so kind to feature a post about my shop on her blog last Friday, October 17 which you can find here

Julie is a new leader on etsy's Promote My Store Team and has featured a number of our teamies on her blog. Very generous of her!!


Julie is also the owner of the wonderful etsy shop Julie's Sugar Soaps. Her shop features a lovely assortment of baby shower, birthday and wedding favors along with her beautiful soaps and gift baskets.


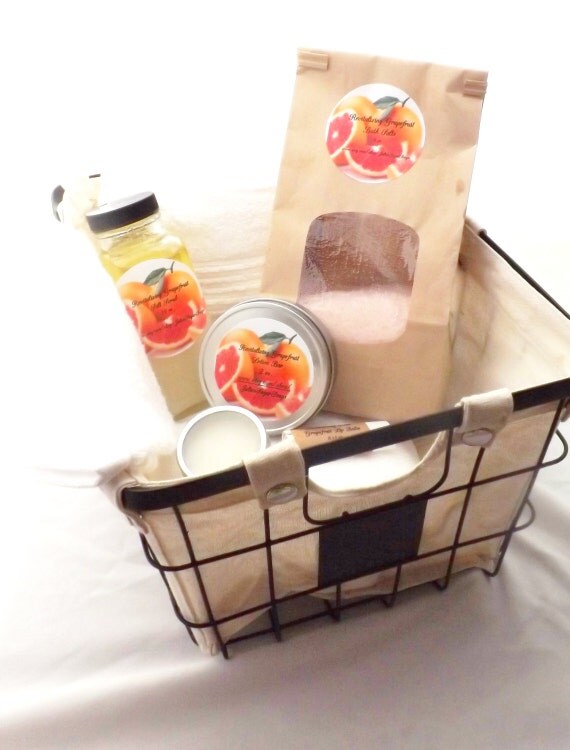
Spa Bath Set with Basket, Super Soft Quick Drying White Towel; Sea Salt Scrub, Lotion Bar, Bath Salts, Sugar Lip Scrub, and Lip Balm


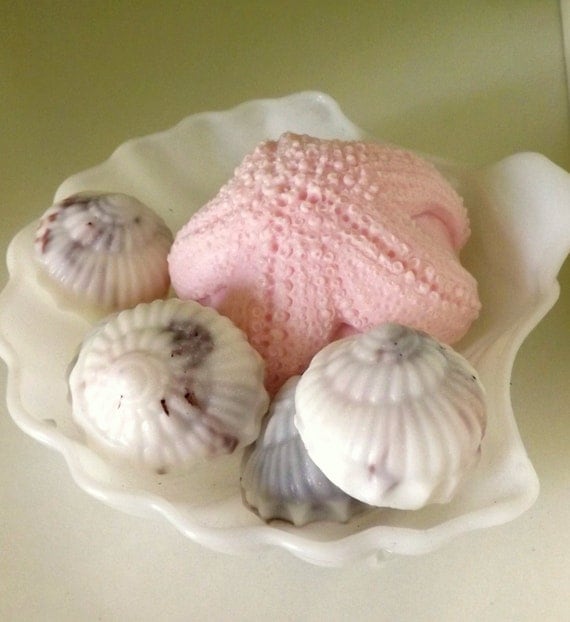
Starfish Soap, 3 Nautilus Soaps, and Vintage Milk Glass Sea Shell Soap Dish; Natural Glycerin Soap; for Beach Lovers, Summer Birthday Gifts

Please be sure to stop by her shop when doing your gift and holiday shopping!

Beth


Saturday, October 11, 2014

Autumn Cards

Happy Saturday! Today I'm featuring cards I made using Ewe-N-Me Printables Fall Words. What a great downloadable -- these images can be used as hang tags or labels for any number of creative projects. There are four different images, and you will get three of each on an 8-1/2 x 11 page.


The lettering on these images is so pretty, and the black and gold is so striking! After I printed the labels and cut them out, I inked the edges and glued them to a piece of dark brown card stock. Using a white gel pen, I added faux stitching around the images.


This is a technique I like a lot but haven't used in a while. Thank you for the reminder, Cyn (from Cynzplace) who used this technique in a recent post here. It really does make your image pop!


I attached the dark brown piece to a gold panel whose edges I inked in dark brown. I decorated the gold panel with ribbon, a paper flower, pearl beads. I stamped a botanical image underneath the ribbon to add a decorative flair and then adhered the panel to an ivory card. I really like the way the ivory contrasts with the warm colors and makes them stand out!


There are so many terrific fall images on Deena's website! Be sure to visit Ewe-N-Me Printables when you are working on your creative projects this weekend.

Thanks for stopping by!


Beth